 Save to Pinterest
 The first batch came out of the oven on a rainy Thursday when I had no plans and a pantry full of half-used bags. I wasn't aiming for perfection, just something sweet to go with coffee. The smell of toasted oats and bubbling caramel filled the kitchen so fast I texted my neighbor to come over. We ate three squares each, still warm, and didn't say much because our mouths were too busy with chocolate and crunch.
I brought these to a potluck once and someone asked if I'd ordered them from a bakery. I didn't correct her right away because I liked the compliment too much. Later, when she found out they were homemade, she made me write down the recipe on a napkin. I still see her at the grocery store and she always mentions those bars.
Ingredients
- All-purpose flour: This forms the base of your crumb, giving structure without making things too dense or cakey.
- Rolled oats: Old-fashioned oats work best here because they hold their texture and don't turn mushy under all that caramel.
- Packed brown sugar: The molasses in brown sugar adds a deep, toffee-like sweetness that plays perfectly with the caramel.
- Granulated sugar: Balances the richness and keeps the crumb from getting too heavy or sticky.
- Unsalted butter, melted: Melted butter makes the crumb come together fast and gives you that buttery, crumbly texture without a mixer.
- Salt: Just a pinch sharpens all the sweetness and makes the caramel taste more like caramel and less like sugar syrup.
- Baking soda: Helps the crust and topping puff slightly and brown evenly in the oven.
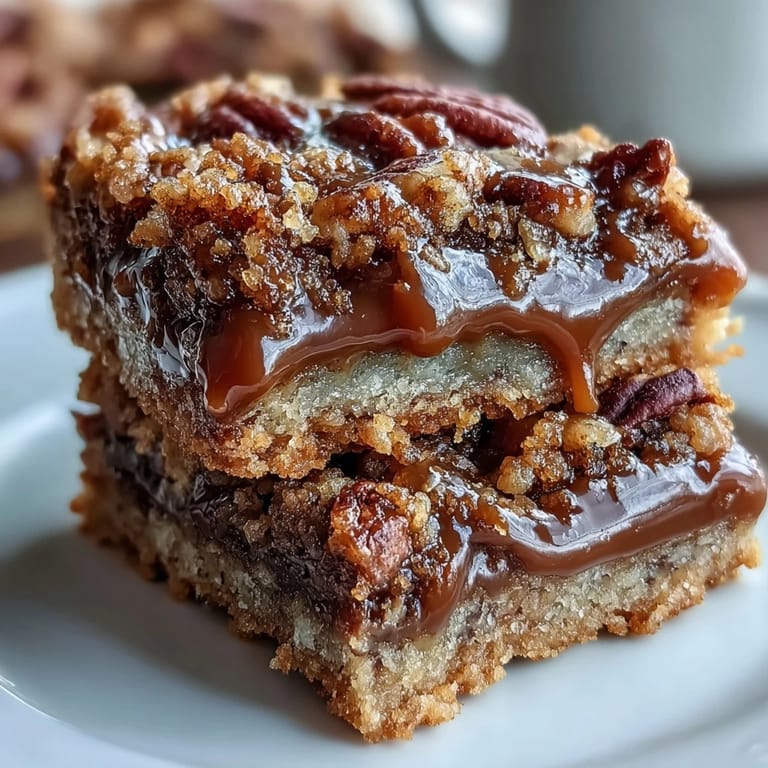
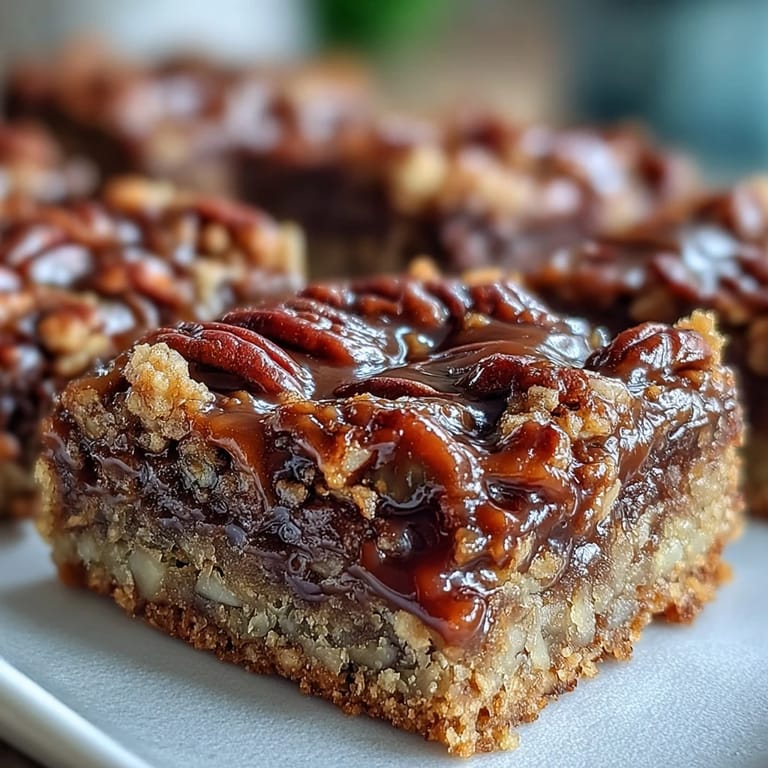
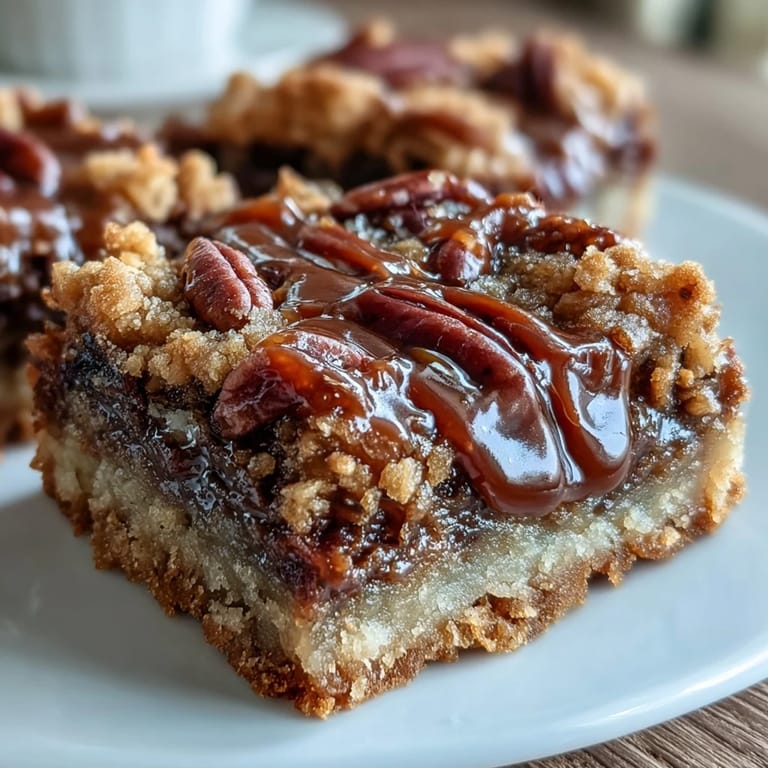
- Semi-sweet chocolate chips: They melt into puddles on the warm crust and provide that bittersweet contrast to the caramel.
- Chopped pecans: Toasted pecans add crunch and a buttery, nutty richness that makes these taste like turtle candies.
- Caramel sauce: Store-bought works great, but homemade gives you control over sweetness and texture.
- Heavy cream: Thins the caramel just enough to pour smoothly and soak into every layer without hardening too fast.
Tired of Takeout? 🥡
Get 10 meals you can make faster than delivery arrives. Seriously.
One email. No spam. Unsubscribe anytime.
Instructions
- Prep the pan:
- Preheat your oven to 350°F and grease a 9x9-inch pan with butter or line it with parchment paper. Parchment makes lifting the bars out easier later, but greasing works fine if that's all you have.
- Mix the crumb base:
- In a large bowl, stir together the flour, oats, both sugars, melted butter, salt, and baking soda until it looks like wet sand. It should clump when you squeeze it but still feel crumbly.
- Press the crust:
- Set aside 1 cup of the crumb mixture for topping. Press the rest firmly into the bottom of your pan with your hands or the bottom of a measuring cup. You want it packed tight so it doesn't crumble apart when you cut the bars.
- Prebake the crust:
- Bake the crust for 10 minutes until it just starts to turn golden at the edges. This step keeps the bottom from getting soggy under all that caramel.
- Warm the caramel:
- While the crust bakes, combine the caramel sauce and heavy cream in a small saucepan over medium-low heat. Stir constantly until smooth and pourable, then take it off the heat.
- Layer the fillings:
- Pull the crust from the oven and immediately sprinkle the chocolate chips over the hot surface, then scatter the chopped pecans on top. The heat will start melting the chocolate right away.
- Pour the caramel:
- Drizzle the warm caramel evenly over the chocolate and pecans, working from the center outward. It will pool and settle into all the gaps.
- Add the crumb topping:
- Sprinkle the reserved crumb mixture over the caramel layer as evenly as you can. Some spots will be thicker than others and that's fine.
- Bake until golden:
- Return the pan to the oven and bake for 15 to 20 minutes, until the topping is golden brown and smells like toasted oats. Don't underbake or the topping will be soft.
- Cool completely:
- Let the bars cool in the pan on a wire rack for at least 30 minutes, or until they're fully set. Cutting them warm will give you a gooey mess instead of clean squares.
 Save to Pinterest
 I made these the night before a long drive once and packed them in a tin between layers of parchment. By the time we stopped for lunch, the chocolate had softened just enough to be fudgy, and the caramel had soaked into the oats. My sister said they were better than any rest-stop candy, and I didn't argue.
How to Store Them
These bars keep for up to a week in an airtight container at room temperature, and honestly they get chewier and better after a day or two. If you want to freeze them, wrap each bar individually in plastic wrap and stack them in a freezer bag. They thaw in about 20 minutes on the counter, or you can eat them half-frozen if you like a firmer bite.
Swaps and Substitutions
If you don't have pecans, walnuts or almonds work just as well, and I've even used peanuts when that's all I had. You can swap the semi-sweet chocolate chips for dark or milk chocolate depending on how sweet you want them. For a dairy-free version, use coconut oil instead of butter and coconut cream in the caramel, though the texture will be a little different.
Finishing Touches
Once the bars are completely cool, you can drizzle extra melted chocolate over the top for a bakery look, or sprinkle a pinch of flaky sea salt on each square before serving. I like to dust the knife with cocoa powder between cuts to keep the edges clean. If you're feeling fancy, serve them with a scoop of vanilla ice cream and watch people lose their minds.
- A little espresso powder in the crumb mixture deepens the chocolate flavor without tasting like coffee.
- Toast the pecans in a dry skillet for a few minutes before adding them to bring out more nuttiness.
- Don't use quick oats or the texture will turn mushy and lose that hearty chew.
 Save to Pinterest
 These bars are the kind of dessert that makes people lean back in their chairs and sigh. Make them once and you'll understand why I keep the ingredients stocked year-round.
Recipe FAQs
- → Can I make these turtle bars ahead of time?
Yes, these bars actually improve after sitting overnight. Store in an airtight container at room temperature for up to a week—the flavors meld and the texture becomes even more chewy and cohesive.
- → What's the best way to cut clean squares?
Let the bars cool completely in the pan before cutting—this typically takes 2-3 hours. For extra clean cuts, chill the pan in the refrigerator for 30 minutes, then use a sharp knife wiped clean between each slice.
- → Can I use homemade caramel instead of store-bought?
Absolutely. Homemade caramel sauce works beautifully here. Just ensure it's slightly warm when mixing with the heavy cream so it combines smoothly. If your homemade caramel is thicker than store-bought, add an extra tablespoon of cream.
- → Why does my caramel layer seem thin?
The caramel naturally spreads into the crevices between chocolate chips and pecans. As long as you use the full cup of caramel sauce, you'll get distinct gooey pockets throughout. Don't worry if it doesn't look like a thick layer before baking.
- → Can I substitute the pecans with other nuts?
Walnuts or almonds work well as alternatives. Toast them beforehand for 5-8 minutes at 350°F to enhance their flavor. Cashews also pair nicely with caramel, though they're softer and less traditional in turtle-style desserts.
- → How do I know when the bars are fully baked?
The topping should be golden brown and you'll see the caramel bubbling up slightly through the crumb layer. The edges may pull away from the pan slightly. The center will still seem slightly soft but will firm up as it cools.